iOS 앱을 앱스토어에 베포 시 소셜 로그인을 사용하기 위해서는 아래 그림과 같이 Apple 로그인을 구현해야 하는 가이드라인이 생겨서 Apple 로그인 구현에 대해 기록해보겠습니다.

먼저, 프로젝트를 생성하고 "Signing & Capabilities" 창에서 Command + Shift + L을 눌러서 Sign in with Apple을 추가해줍니다.
그리고 프로젝트의 bundle ID와 Team이 설정되어 있어야 합니다.
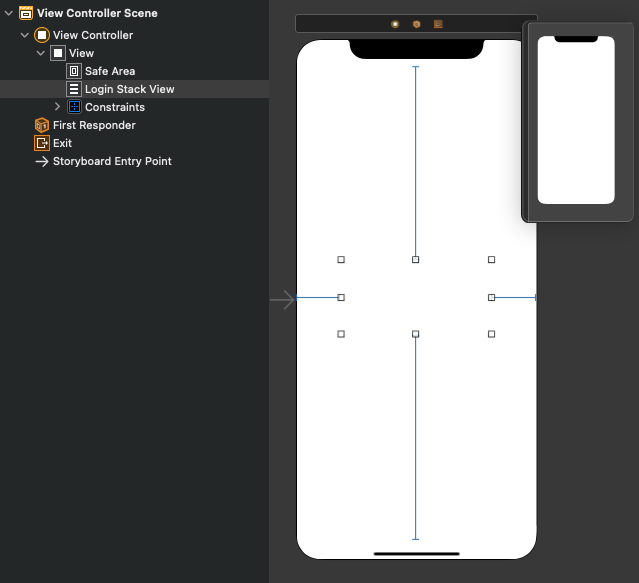
그리고 애플 문서에서 제공하는 예제에 따라 스토리보드에서 아래 그림과 같이 StackView를 하나 만들어줍니다.
실행 시 아래 오른쪽 그림과 같이 버튼이 생깁니다.
그 후, ViewController로 넘어가서 아래 코드를 작성해줍니다.
"import AuthenticationServices" 또한 임포트해줍니다.
func setupProviderLoginView() {
    let authorizationBtn = ASAuthorizationAppleIDButton(authorizationButtonType: .signIn, authorizationButtonStyle: .black)
    // 버튼 눌렀을 때 처리할 메서드 추가
    authorizationBtn.addTarget(self, action: #selector(handleAuthorizationAppleIDBtnPressed), for: .touchUpInside)
    // 아까 만들었던 스택뷰에 애플 로그인 버튼 추가
    loginStackView.addArrangedSubview(authorizationBtn)
}
// 인증을 처리할 메서드
@objc
func handleAuthorizationAppleIDBtnPressed() {
    let appleIDProvider = ASAuthorizationAppleIDProvider()
    let request = appleIDProvider.createRequest()
    // 이름과 이메일 요청
    request.requestedScopes = [.fullName, .email]

    let authorizationController = ASAuthorizationController(authorizationRequests: [request])
    authorizationController.delegate = self
    authorizationController.presentationContextProvider = self
    authorizationController.performRequests()
}
setupProviderLoginView는 viewDidLoad() 메서드에서 호출해줍니다.
handleAuthorizationAppleIDBtnPressed() 메서드에서는 사용자의 전체 이름과 이메일을 이용해서 인증 요청을 진행합니다.
authorizationController는 presentationContextProvider를 이용해서 아래 코드와 같이 로그인 콘텐츠를 제공하는 모달 창을 가져오는 함수를 호출합니다.
extension ViewController: ASAuthorizationControllerPresentationContextProviding {
    func presentationAnchor(for controller: ASAuthorizationController) -> ASPresentationAnchor {
        return self.view.window!
    }
}
그리고 인증이 성공하거나 실패하면 처리하기 위한 메서드를 아래 코드와 같이 ASAuthorizationControllerDelegate를 이용해서 호출합니다.
extension ViewController: ASAuthorizationControllerDelegate {

    func authorizationController(controller: ASAuthorizationController, didCompleteWithAuthorization authorization: ASAuthorization) {
        switch authorization.credential {

        case let appleIDCredential as ASAuthorizationAppleIDCredential:

            let userIdentifier = appleIDCredential.user
            let fullName = appleIDCredential.fullName
            let email = appleIDCredential.email

            print("UserID: \(userIdentifier)")
            print("FullName: \(fullName)")
            print("Email: \(email)")

        case let passwordCredential as ASPasswordCredential:

            let username = passwordCredential.user
            let password = passwordCredential.password

        default:
            break
        }
    }

    func authorizationController(controller: ASAuthorizationController, didCompleteWithError error: Error) {
        // 에러 처리
    }
}
사용자의 자격 증명이 성공하면 다음 페이지로 이동시키는 처리 등을 didCompleteWithAuthorization 메서드에서 처리할 수 있습니다.
에러가 발생할 경우의 처리를 didCompleteWithError 메서드에서 처리할 수 있습니다.
여기까지 하고 실행을 하게 되면, 아래 그림과 같이 애플 로그인 버튼이 생깁니다.

마지막으로, 앱이 실행되고 나서 사용자의 자격 증명 상태를 확인하는 메서드를 통해 로그인을 하거나 건너뛸 수 있습니다.
AppDelegate의 didFinishLaunchingWithOptions 메서드에서 처리해줍니다.
func application(_ application: UIApplication, didFinishLaunchingWithOptions launchOptions: [UIApplication.LaunchOptionsKey: Any]?) -> Bool {

    let appleIDProvider = ASAuthorizationAppleIDProvider()
    appleIDProvider.getCredentialState(forUserID: "UserID") { (credentialState, error) in
        switch credentialState {
        case .authorized:
            print("authorized")
            break
        case .revoked:
            print("revoked")
            break
        case .notFound:
			print("notFound")
			break
		default:
			break
		}
    }

	return true
}
위의 forUserID는 didCompleteWithAuthorization에서 출력한 UserID를 넣으면 확인할 수 있습니다.
사용자의 자격 증명 상태(credentialState)는 4가지가 존재합니다.
.authorized - 사용자의 자격이 증명된 상태
.revoked - 사용자의 자격 증명이 취소된 상태
.notFound - 사용자의 자격 증명을 찾을 수 없는 상태
.transferred - 애플 문서에 설명이 없네요...
참조:
Apple Developer Documentation
developer.apple.com
'iOS' 카테고리의 다른 글
| [iOS] FSCalendar Custom Header Swift (2) | 2021.03.10 |
|---|---|
| [iOS] Firebase와 Google 로그인 연동하기 (0) | 2021.02.02 |
| [iOS] NSOperationQueue와 GCD Queue의 차이점 (0) | 2021.01.29 |
| [iOS] URLSession API (0) | 2021.01.21 |
| [iOS] AppDelegate & SceneDelegate (0) | 2021.01.19 |

댓글